« New Online Time Clock MTS Features Posted | Main | The Time Off Report Explained »
August 1, 2011
Importing Employees into Online Time Clock MTS
A recent update to Online Time Clock MTS added the ability to create multiple employees simultaneously by importing a CSV file containing all the settings for the employees that are to be created. There's a help topic covering importing employees but I thought it was worthwhile having a longer entry covering some of the finer points of the process that you might be interested in.

The Import Employees Screen - Click to Enlarge
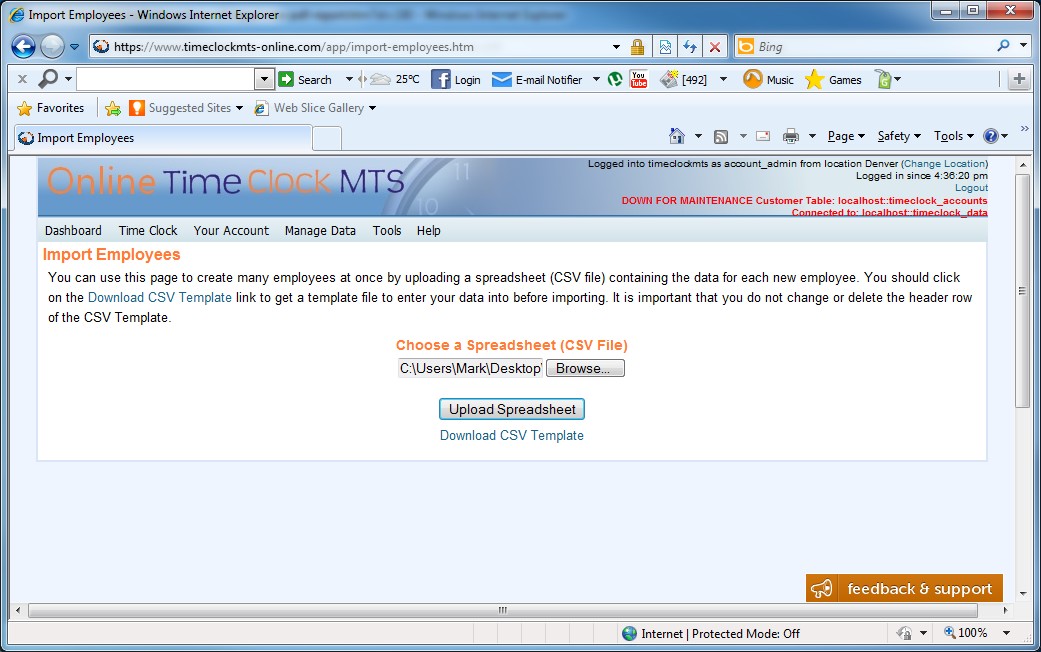
Firstly, the Import Employees screen can be seen above. It is reached from the Manage Data->Import Employees menu and is available to the Account Administrator and location administrators. The screen can be used to import a CSV (comma separated value) text file and create multiple employees from this data very quickly. It's worth noting that employees imported using this screen will be added to the Online Time Clock MTS Location that the current user is logged into.
We've tried to make creating a CSV file for importing as simple as possible and users can easily download a template file by clicking the Download CSV Template link. This will download a CSV file that (should) automatically open in your installed spreadsheet program. It's worth taking a minute to explain what a CSV file is. Basically it's a plain text file consisting of rows of values with each value separated by a comma (,) character and each row separated by a return character. Typically CSV files are edited with a spreadsheet program (like Microsoft Excel, Open Office, or even Google Docs) but they can also be edited with simple text editors like Windows Notepad. If you want to know more about CSV files you should head over to the Wikipedia entry on Comma-separated values. Let's get started with the actual import process.
The Import Employees Screen - Click to Enlarge
1. Create the CSV File
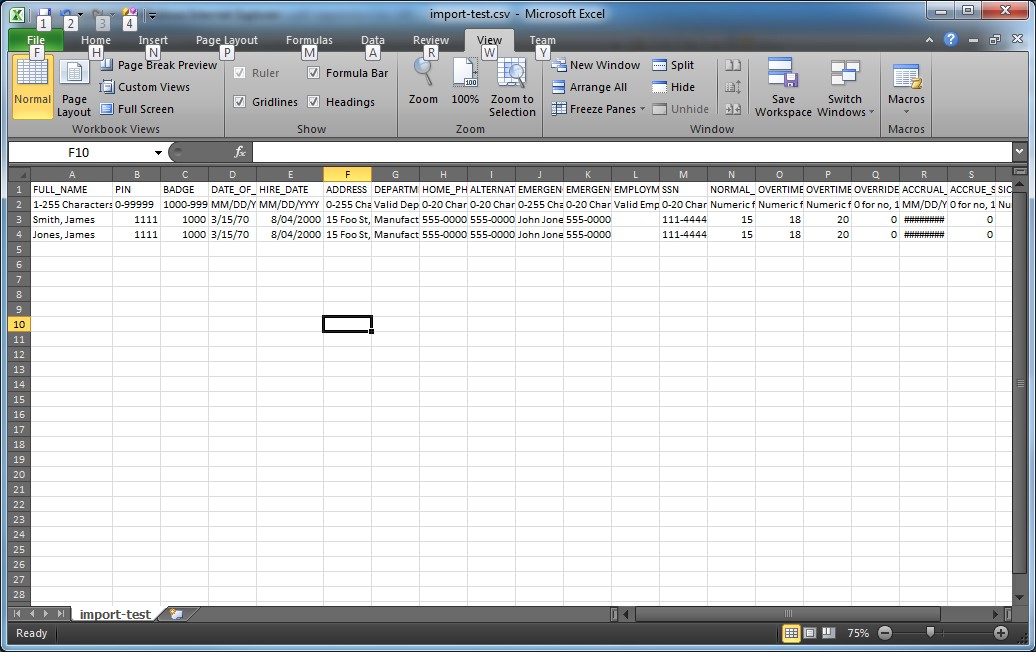
As mentioned above you should click the Download CSV Template link to download a correctly formatted template for importation to Online Time Clock MTS. When opened in your spreadsheet program it should look something like the image above. The top row is a header row and contains a name for each column with each name describing what employee setting it corresponds with. The header row should not be deleted or edited in any way. The second row includes some helpful tips on the values that should go in each column. This row can be deleted if you like or left in place, Online Time Clock MTS will ignore it during the file import process if it is left intact .
Let's take a moment to look at some of the explanatory notes on the second row and how to interpret them. The note in column 1 says "1-255 Characters". This means that the employee FULL_NAME field must be between 1 and 255 characters long. If you do not fill in this field correctly the entire row for that employee will be ignored during the import process. Other columns include notes like 'Numeric'. These require numbers to be entered into them, typically if you fail to put a numeric value in these fields then those values will default to zero (0). Another column type of interest is the date time format columns (for hire date and date of birth for example). These require a date entered of the format MM/DD/YYYY. An invalid value here will result in that setting default to the current date.
The fields DEPARTMENT and EMPLOYMENT_TYPE allow you to enter names of existing departments and employment types into them. If you do not enter the EXACT name of an existing department or employment type then these settings will default to no assigned department or employment type.
In the CSV file above I've entered details for two new employees. If there are already employees with the same full name defined in Online Time Clock MTS then those rows will be ignored during the importation process. Once the data is entered the way you like it you can save the CSV file onto your computer (making sure to keep it in CSV format).
The Import Employees Screen - Click to Enlarge
2. Select the CSV File
The next step is to actually import the CSV file. To do this you must first select the file you want to upload to the Online Time Clock MTS servers. Do this by clicking on the Browse button. You might find that this button has a different label on it in some browsers. Once you've done this a file explorer dialog will popup allowing you to navigate to your CSV file and then select it. Once you've selected it the path to the file should be shown next to the Browse button. Now we're ready to upload the CSV file and create the new employees. This is done by clicking the Upload Spreadsheet button.

The Import Employees Screen - Click to Enlarge
3. Upload the CSV File
Once you've clicked the Upload Spreadsheet button for your selected CSV file Online Time Clock MTS will upload and process the file. Any files with a missing header row, a modified header row, or files of the wrong format completely will be ignored and a status message will inform you of the fact. If the file format is OK then Online Time Clock MTS will process it row by row and give a result for each row. In the example above you can see that the file was uploaded successfully and two new employee records were created. When there is a problem with the data in a row that prevents an employee being created a message will be displayed telling what the problem is and what row in the CSV file the contains the problem.
As an extra safety feature Online Time Clock MTS will not import new employees with the same name as an existing employee. We do this because we don't want you to create duplicates if you happen to accidentally import the same file twice. One huge advantage of this is that if you have a problem with one row in your CSV file the first time you import it then you can fix up that row and import the whole file again and the employees you created the first time will not be re-created.
Normal subscription limits apply when you're using the Import Employees screen to create new employees. So if your current Online Time Clock MTS subscription is good for 10 employees then the Import Employees screen will not allow you to create employees beyond this point.
Conclusions
The Import Employees screen is a great way of creating multiple employees in just a few minutes. While you can pretty easily copy employees on the Manage Employees importing employees via CSV files is clearly a lot faster and potentially a lot more flexible. We hope you find it useful!
Posted by markn at August 1, 2011 9:44 AM
