« Change to Account Login Page | Main | Online Time Clock MTS and Internet Explorer 11 »
November 5, 2013
Getting Started with Online Time Clock MTS
This guide is designed to get you up and running with Time Clock MTS within a few minutes of your first look at the system. This tutorial assumes you're logged into Online Time Clock MTS using the automatically created account administrator login.
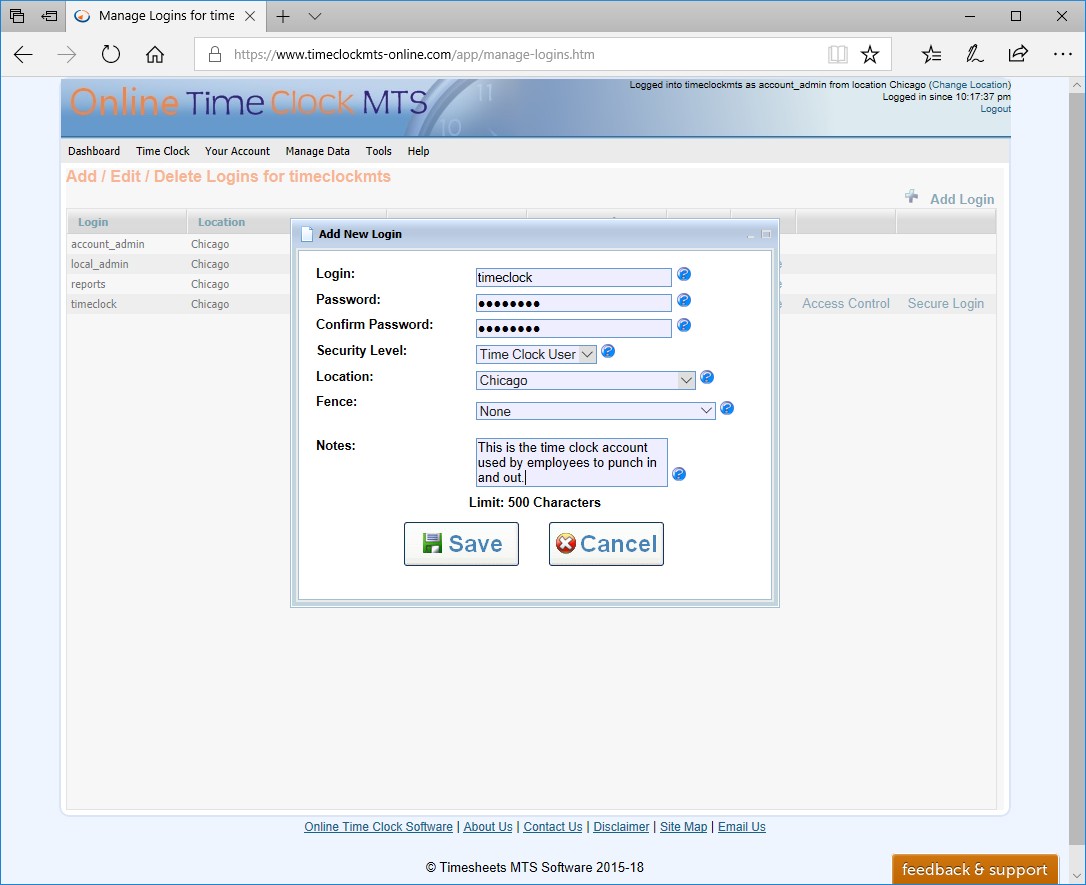
Figure 1 - Adding a Timeclock Login (Click to Enlarge)
Create a Time Clock User Login
The first step is to create a time clock user login for your employees to use. Time clock logins can only access the employee time clock screen and they are designed for regular employees to use. To create a time clock user login follow these steps:
- From the Online Time Clock MTS Dashboard click the Manage Logins icon (the padlock icon).
- On the Manage Logins screen click the Add Login link at the top right of the list of logins.
- Enter a login for your employees to use and a password. Make sure to set the security level to "Time Clock User". See the Figure 1 above for what this should look like.
- Click the Save button to save the new login.
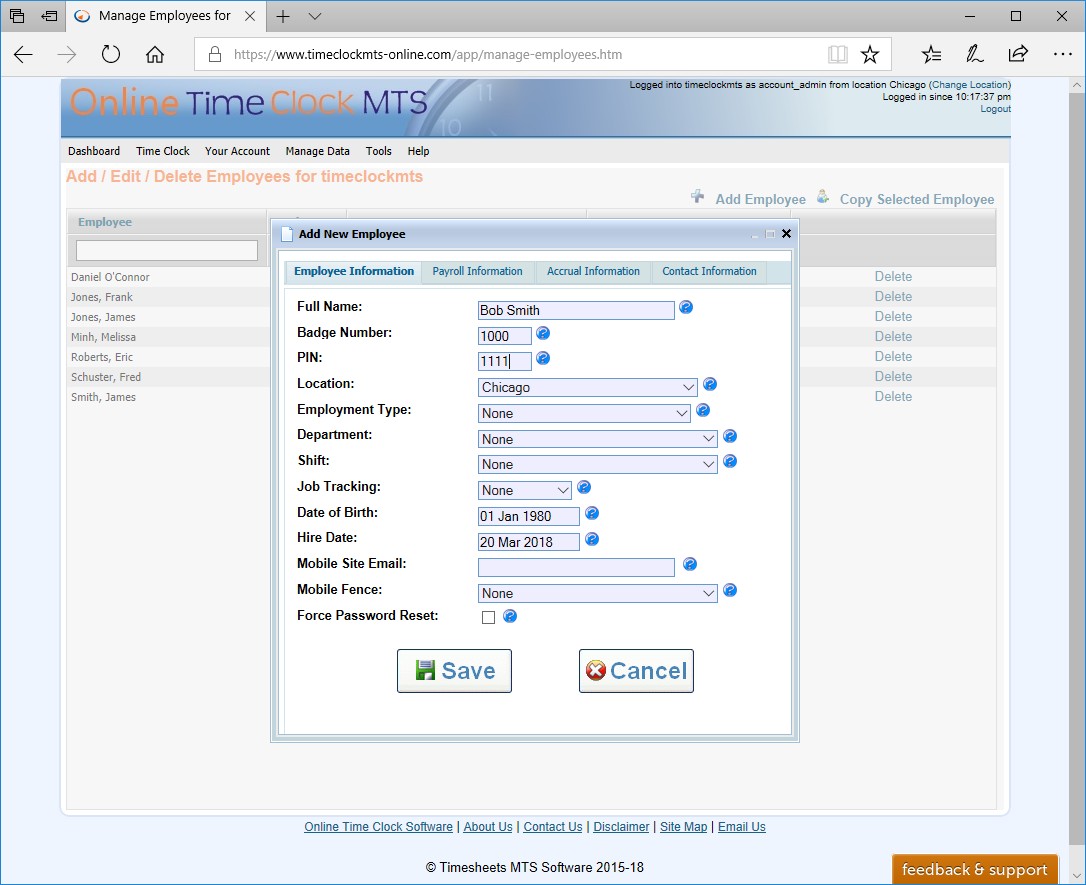
Figure 2 - Adding an Employee (Click to Enlarge)
Create Employees
The next step is to create an Online Time Clock MTS employee for each of your own employees whose time you want to track. Creating employees is simple. Just click the Dashboard menu item at the top left of the screen and then follow these steps:
- From the Online Time Clock MTS Dashboard click the Manage Employees icon (the Employee icon).
- Click the Add Employee link at the top right of the list of employees.
- Let's just enter a minimal amount of information for our new employee. All that is needed for an employee to get started is a Name, a Badge Number, and a PIN. Let's call our new employee "Bob Smith", leave the Badge Number at the suggested value, and give the employee a PIN of 1111. Once you've done all of this the screen should look something like Figure 2 above.
- Click the Save button to save the new employee.
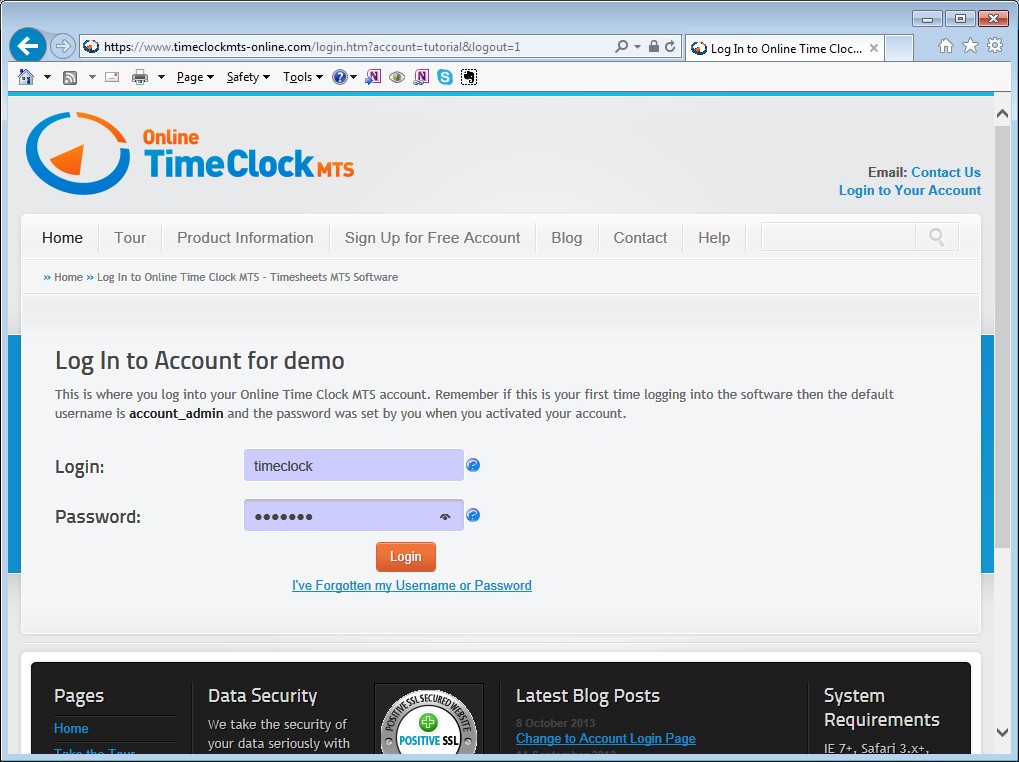
Figure 3 - Logging In (Click to Enlarge)
Log Into the New Timeclock Login
Now we're going to logout of Online Time Clock MTS by clicking the small Logout link at the top right of the screen. This will take us back to your account login page. Which will look something like Figure 3 above. Enter the login and password for the time clock user login which we entered earlier and click the Login button. If you've done everything properly you will be taken to the employee time clock showing our newly created employee (see Figure 4 below).
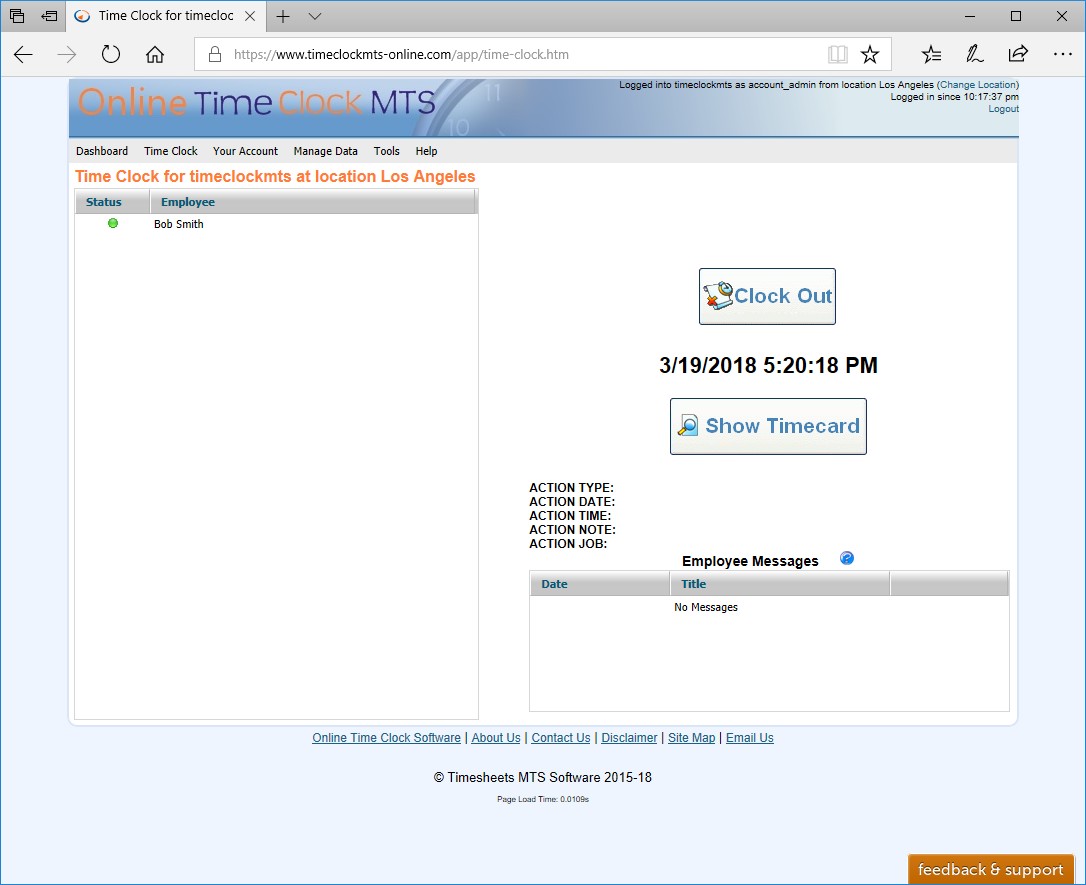
Figure 4 - The Employee Time Clock (Click to Enlarge)
Punch In and Out
Punching this employee in and out is very simple. Just follow these steps:
- Click on the employee's name in the employee list. When you do that the label on the Clock Out button should change to Clock In.
- Click the Clock In button. You'll be shown a popup where you'll need to enter the employee PIN. Remember we set this PIN to 1111. Enter the PIN and click the Enter button and you'll punch the employee in. The red status icon next to our employee should change to green indicating they are now clocked in AND the label on the button should change to Clock Out .
- Once you're happy the employee actually is clocked in click the Clock Out

Figure 5 - Logging In (Click to Enlarge)
Log in as the Account Administrator and Run Reports
The last step in this getting started tutorial is to run a report on the employee time punches we've just recorded. Because we're currently logged into a time clock user security account we cannot run any reports so we're going to need to log out and back into our Online Time Clock MTS account administrator login. Click on the Logout link again at the top right of the screen and we'll be back at the account login screen. Here we can enter our account administrator login and password (these are the same login and password you created when you first signed up for your account). When done correctly it should look something like Figure 5 above, when you're happy click the Login button and you'll be taken back to Online Time Clock MTS dashboard.
Click the Reporting icon (the clipboard icon) and when you're on the Reporting screen click the Payroll Reports icon. You'll be shown the Payroll Reports screen (see Figure 6 below).
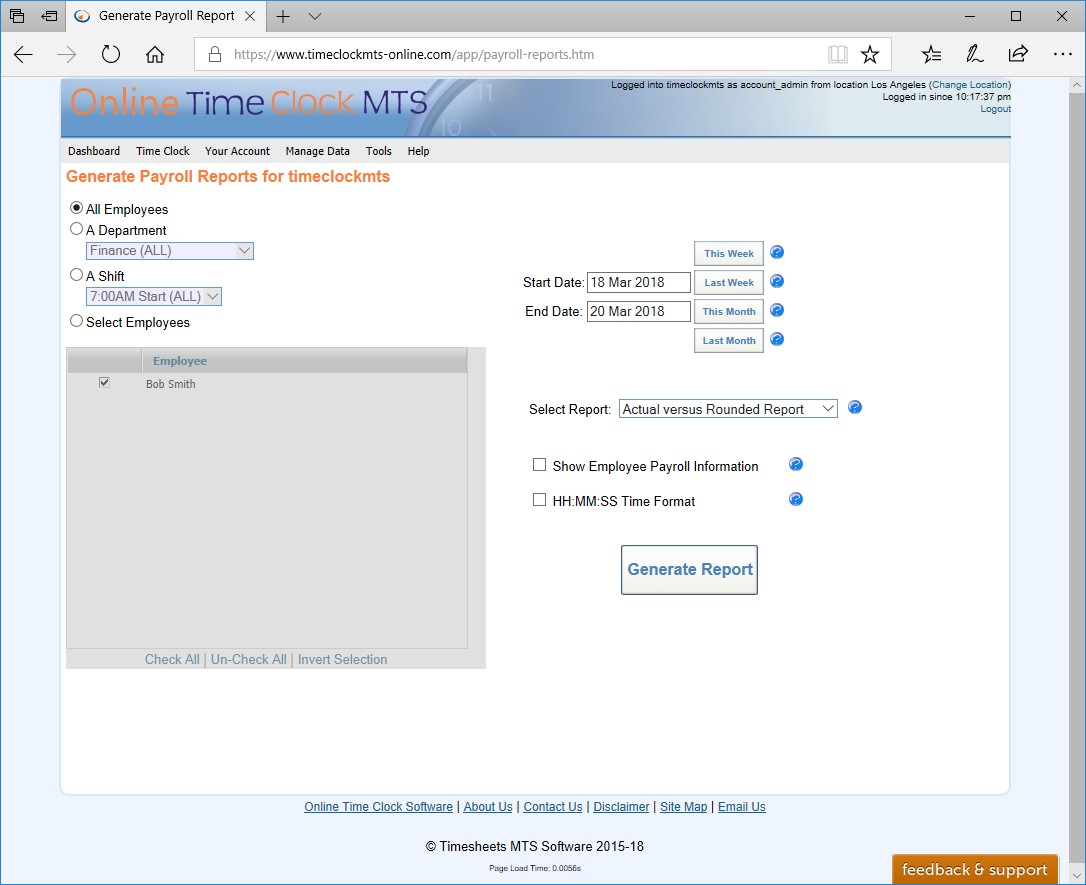
Figure 6 - The Payroll Reports Screen (Click to Enlarge)
Click the This Week button to run a report for this week and then click the Select Report dropdown and choose the Punchcard Report. When that's done we can go ahead and click the Generate Report button and the report (see Figure 7 below) will appear.
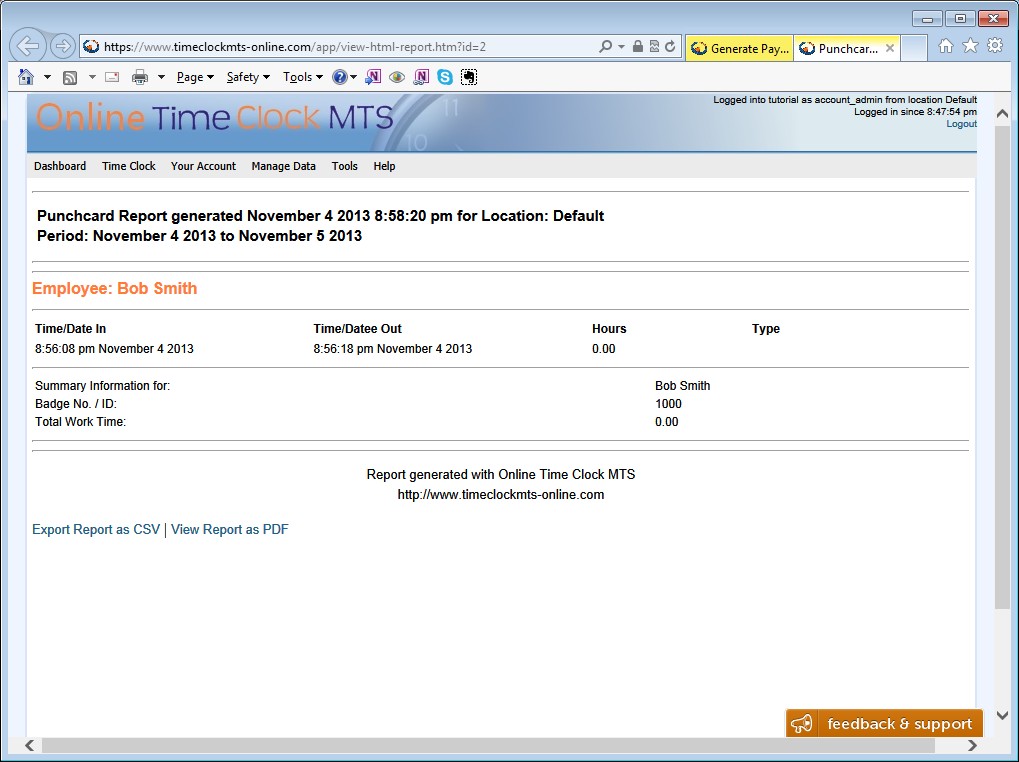
Figure 7 - The Punchcard Report (Click to Enlarge)
What Next?
The next steps are to set up Time Clock MTS to suit your payroll rules including overtime, sick time, vacation time, or report rounding. You might want to set up some different security logins such as reports login for your payroll staff. And don't forget that Online Time Clock MTS allows you to track multiple locations that can even be in different timezones.
Don't forget your employees can use the time clock on mobile devices and you can restrict what computers or devices they use by IP address or by creating GeoFences that control the geographic locations they can punch in and out from.
Posted by markn at November 5, 2013 1:15 PM
